Original Article...I was happily playing my Historic Elves this month when out of nowhere a similar deck to what I am about to show you surprised me. It beat me turn 3-4 and I was powerless against it. It was irritated that such jank should beat my carefully crafted Elves deck that I had to go look at my tracker to see what I just got beat by. I only saw a few cards, but quickly formed my own list that seems to work pretty well for me. Here's what I came up with: The Deck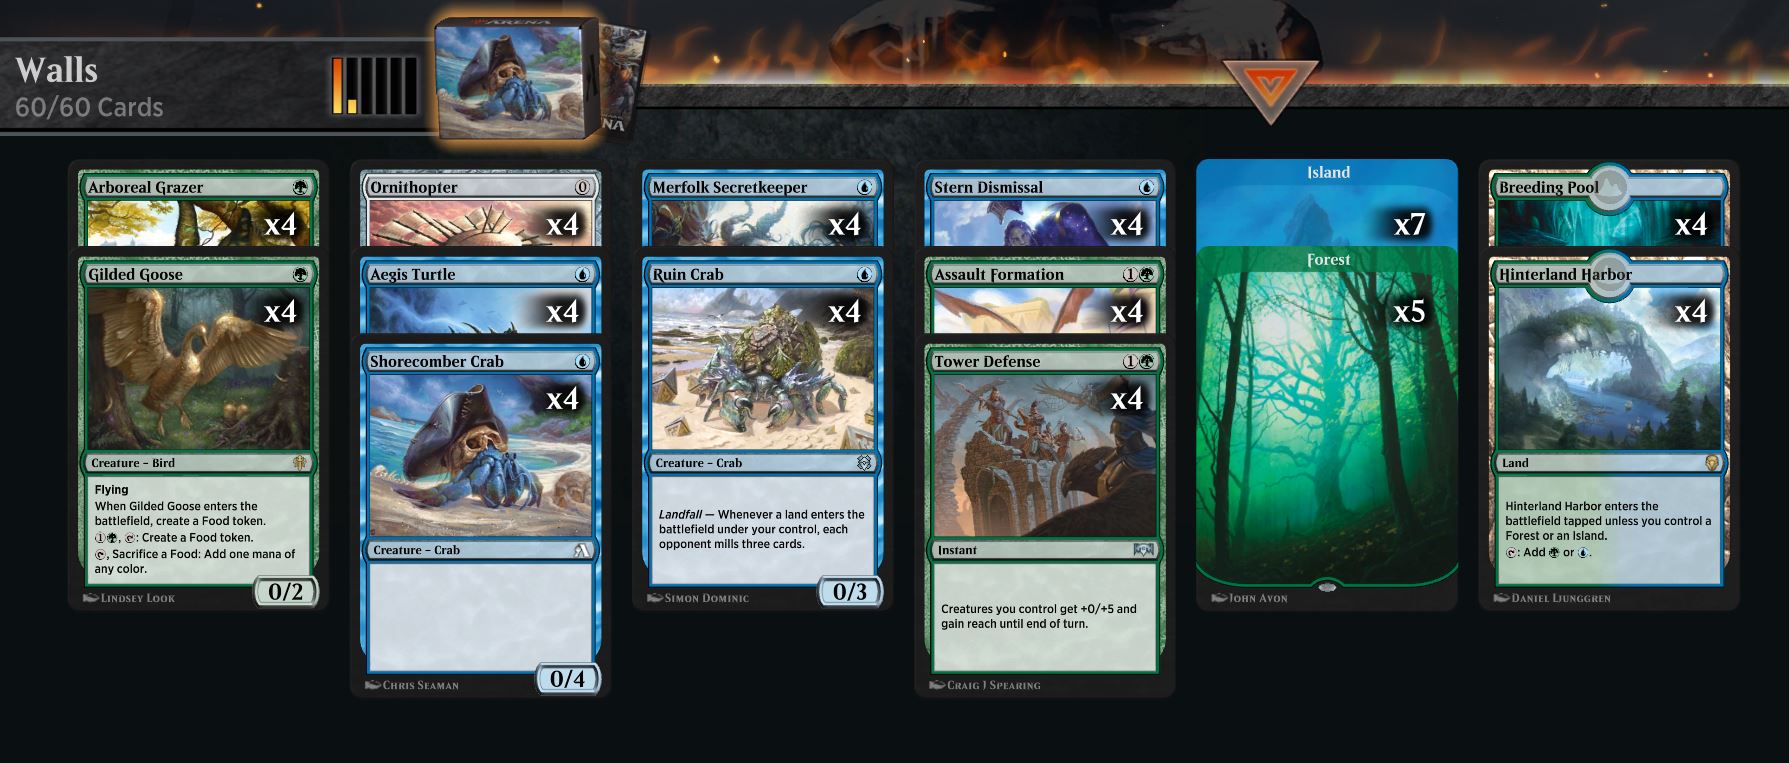
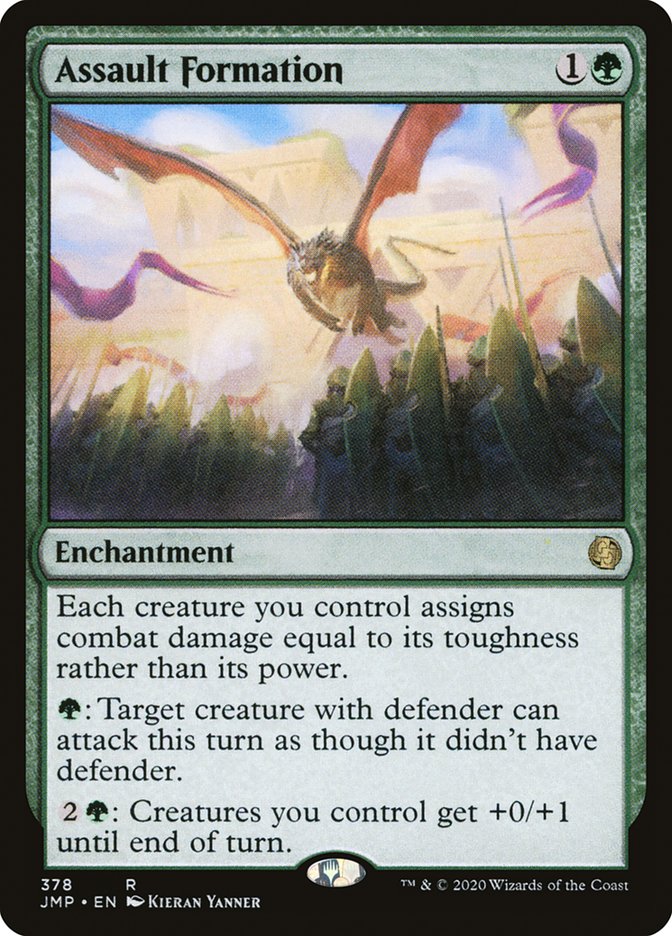
How does it work?It's fairly simple. Slam down harmless 0/x creatures, then drop Assault Formation and attack all-in for the surprise win. You absolutely must hard mulligan for Assault Formation in your opening hand. There will be games where you won't get it so just concede and start another game. This is a pretty forgiving deck. I've mulliganed down to Assault Formation and 2 lands several times now and still pulled off a fast win. Lets go over what each card is best used for:
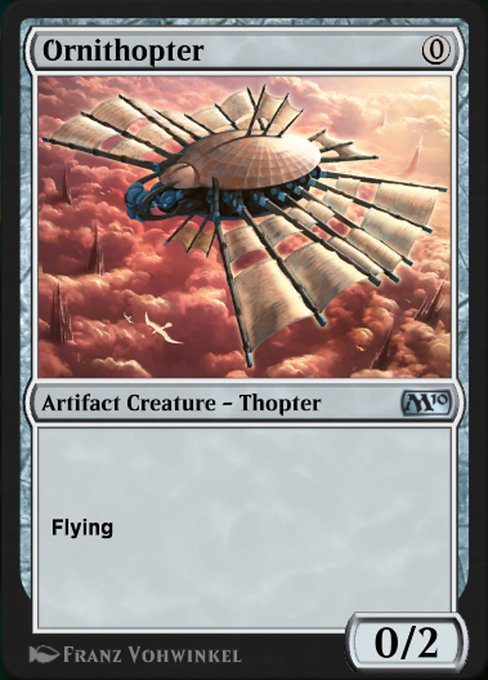
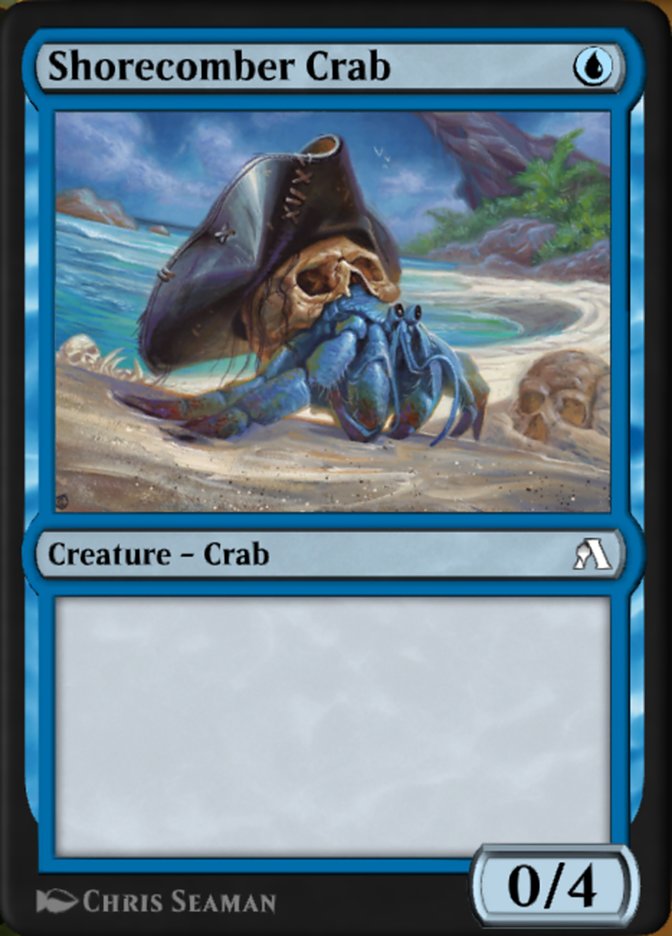
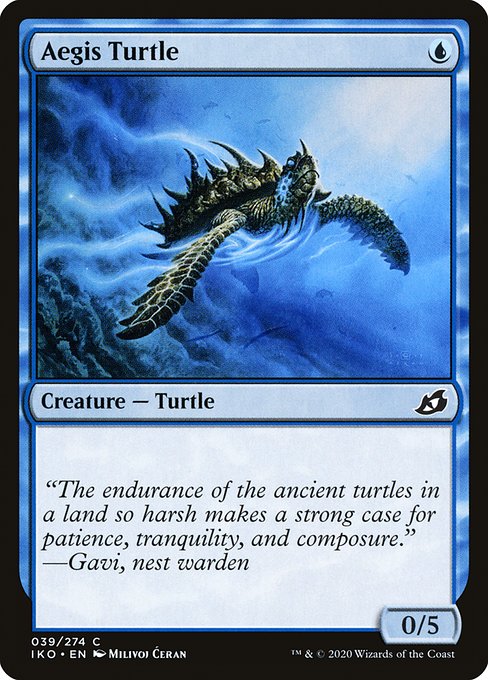
Ornithopter is an excellent free drop, especially on turn 1. It's also our only other flyer to add some evasion in to the deck. Shorecomber Crab and Aegis Turtle are both big beefy creatures that seem so innocent on the first turn or two. Once Assault Formation is played, they are serious threats that are hard to remove and can steam roll over most of your opponent's early creatures.
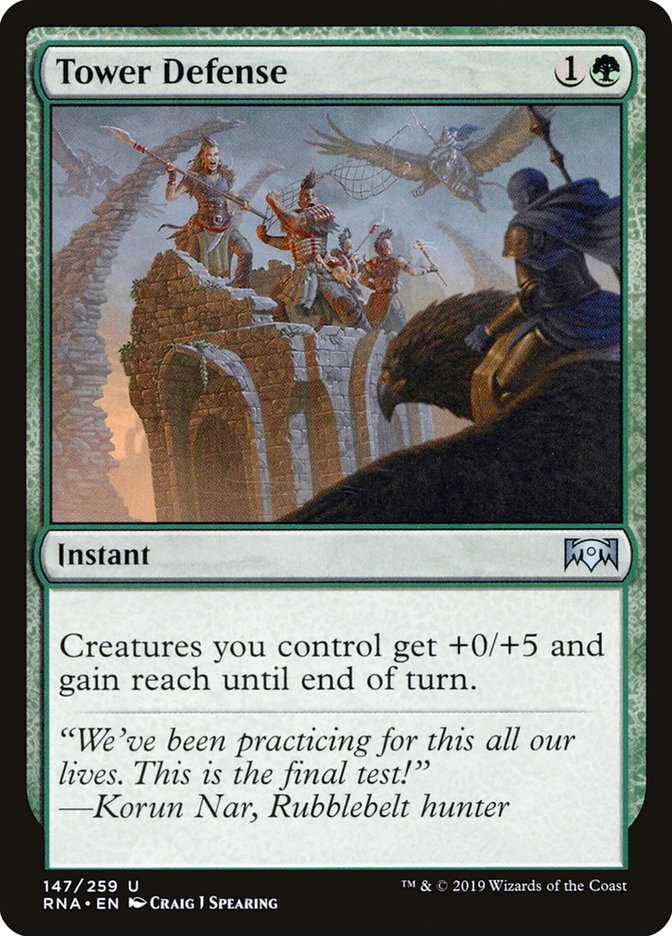
Assault Formation is the main card of this deck. Without it, your creatures are absolutely useless. You must have Assault Formation in your opening hand. Mulligan until you do. If you have too few cards, just concede and start the next game. It's rare you don't get it by at least the 2nd or 3rd mulligan. Just make sure you leave yourself with at least 2 lands of different colors and you can still play Assault Formation, then just whatever creatures you draw. I've won several games with a 3 card starting hand. The deck is pretty forgiving to get you going. The downside to this deck is that if Assault Formation is destroyed or removed somehow, you may as well concede, as the rest of the game will be spent waiting to draw another, and your opponent will have recovered by then. Players don't typically run much Enchantment removal, so you're usually safe from this. It does happen once in a while though. Tower Defense can be used in 3 different ways. The first is the obvious one-shot kill. If your opponent doesn't bother blocking because you don't have enough for lethal, then Tower Defense will almost always be a fast lethal strike. Secondly, you can use it as a defensive move, both blocking and attacking. If the opponent has creatures much larger than you that you are having a hard time playing around, you can use this to beef up your big creatures to kill their big creatures. The same goes for blocking, let them attack in with their big creatures, and then play this. Third, you can use this to avoid a non-destructive board wipe. Quite a few board wipes just do mass damage. This can boost your creatures above the minimum toughness needed to beat most of these board wipes. Stern Dismissal can be used in multiple ways as well. Remove something in your way of attacking or an opponents enchantment, or use it to save your own Assault Formation enchantment from being destroyed, or one of your creatures.
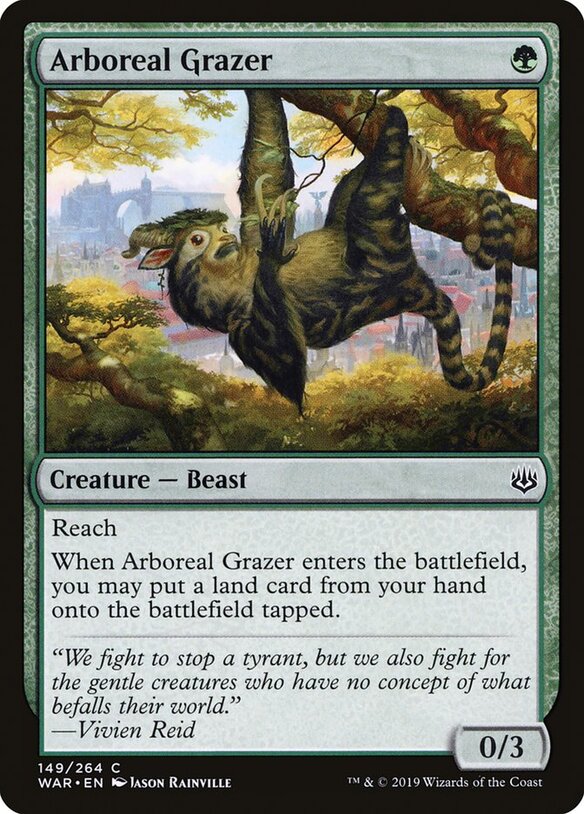
Because this deck moves very fast, we want to make sure we have fast mana. 20 mana seems to be plenty for this deck to work quickly. Keep in mind 70% of your cards are 1 mana. One playset of cards is 0 mana, and then your most important card is only 2 mana. You don't need a lot. Because you are trying to hit hard and fast and end the game by turn 4 or so, you want to make sure you always have mana available in the way of not using any tap lands. GamePlay ExamplesSo far after playing this deck daily for 9 days straight each morning, I have a decent 65% win rate in the BO1 Play queue. What surprises most people is the odd assortment of cards. I am playing both mono-green ramp cards and mono-blue mill cards, along with some random useless blockers. Most opponents don't think twice about it and just think it's either one of the two variants, when it's really neither one. Instead Assault Formation gets dropped and all of those useless creatures are suddenly a massive threat. This morning I went 4-0 in just 8:34 mins. Yesterday I went 4-2 in 15 minutes. The deck is fast. Here's some examples of what to expect with good opening hands. Game 1 - Against Shrines Turn 1 - Island, Ruin Crab Turn 2 - Forest, Aboreal Grazer--> Breeding Pool, Aegis Turtle Turn 3 - Shorecomber Crab, Assault Formation, attack all in. Opponent didn't even get going yet with their shrines and instantly conceded. Game 2 - Against Zombies? Turn 1 - Island, Aegis Turtle, Ornithopter Turn 2 - Hinterland Harbor, Shorecomber Crab, Arboreal Grazer-->Breeding Pool Turn 3 - Hinterland Harbor, Assault Formation, attack all in. Opponent conceded with a few creatures and a saga out on the field. Game 3 - Against Mono White Angels/Lifegain Turn 1 - Breeding Pool, Arboreal Grazer-->Breeding Pool Turn 2 - Hinterland Harbor, Aegis Turtle, Merfolk Secret Keeper Turn 3 - Ornithopter, Assault Formation, attack all in, opponent didn't block Turn 4 - Attacked all in, Opponent didn't block since I did not have lethal and he was just getting his lifegain going. I then activated the Assault Formation ability to +1 all my creatures and killed him. Game 4 - Against Toski shennagins of some kind Turn 1 - Forest, Gilded Goose-->Food Token Turn 2 - Hinterland Harbor, Ruin Crab, Shorecomber Crab Turn 3 - Forest, Merfolk Secretkeeper, Assault Formation, Attack all in with no blocks. Turn 4 - Forest, Arboreal Grazer, attack all in. Opponent had critical mono green stuff out that he didn't want to die, and I did not have lethal showing. He did not block, so I activated Assault Formation's ability to +1 everything, and killed him. Now the next 2 games I lost. The first loss was because the opponent destroyed my Assault Formation. I waited 2 more turns and conceded. The second loss was because I got greedy and was just loading the board with all my creatures. I was going to drop Assault Formation on the next turn for a glorious attack, except the opponent looked at my hand and discarded my Assault Formation. Word to the wise, don't be greedy, get that thing down ASAP. 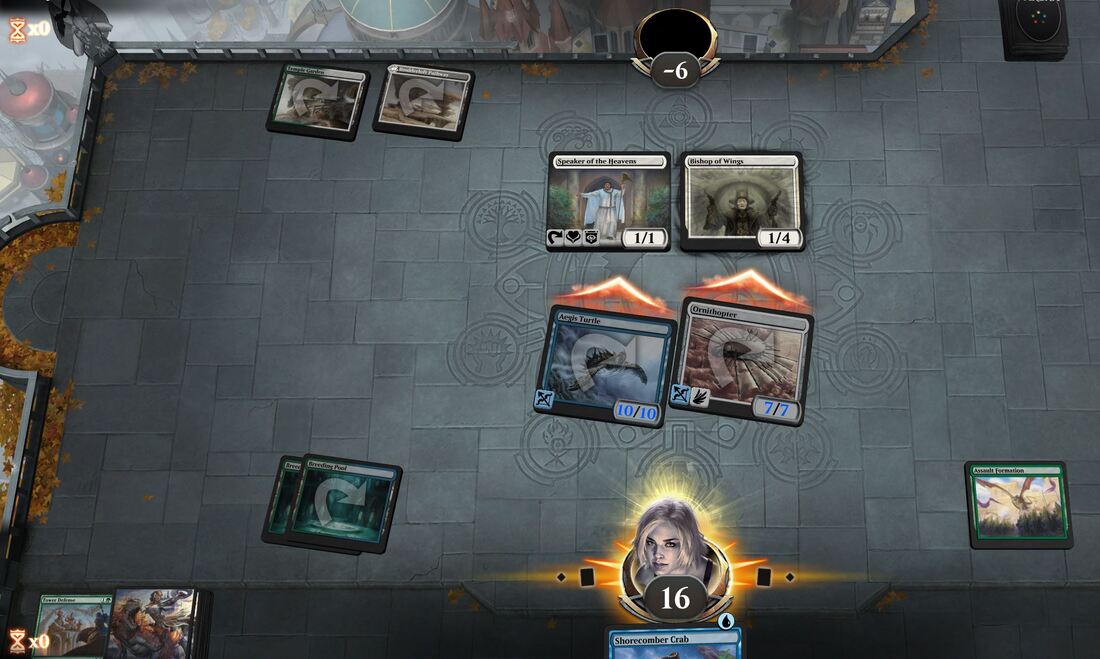 The game above was a quick turn 3 win against the hard to beat mono white lifegain angels deck. I mulliganed down to 5 cards to get an Assault Formation and 2 lands in my hand. Turn 1 - Breeding Pool, Aegis Turtle, Ornithopter Turn 2 - Breeding Pool, Assault Formation, Attack. Turn 3 - drew a Tower Defense, I figured the opponent wasn't going to let his two key pieces die, so he didn't block. I played Tower Defense for lethal. Yes, that's a turn 3 win against that lifegain angels deck, with only 2 lands, and a 5 card starting hand. It's very forgiving! What Doesn't WorkIt does not play well against full on deathtouch decks unless you have enough flyers out to outlast the opponent. If not, just concede. It does not play well against Golgari decks that seem to find all the things to kill your stuff with, and then can also destroy your Assault Formation. Cards like Thought Seize and Assassin's Trophy is an immediate concede. Any control that takes your Assault Formation, such as Skyclave Apparition, or other white/blue enchantments that can steal your stuff. Just concede and start the next game. Obviously if you don't have a great opening hand and slam out a bunch of creatures and get overwhelmed by the opponent, then you may as well concede unless you can somehow kill all their stuff (Assault Formation ability or Tower Defense). I hit all of these examples the very next day and only got a 50% win rate. The day before I didn't see as much of these examples and ended the day with a 65% win rate. In conclusion...These are just examples of perfect opening hands. Even a bad opening hand can be mulliganed a couple times to become a good one and still be perfectly playable. I tried this deck out in the BO1 Historic Ladder, but only made it to mid silver before getting stuck with the more powerful meta decks, and that included a ton of losses. My win rate was not good in ladder play. This deck is more of fast deck to get your daily 4 or so wins in and move on. Anyway, I hope you found this deck tech fun, exciting and useful. Please let me know if you have any questions, comments or tweaks you can think of. I really enjoy off-meta decks that do well.
0 Comments
Here is the latest gallery all caught up from last summer. |
Categories
All
Archives
August 2022
|

- Home
-
Abandoned Travels
-
Abandonments
>
- 2014-2015 >
-
2013
>
- CMX Construction
- Orange House 01
- Fertilizer Plant
- Egg Plant
- Box Plant
- Ellaville Bridge Revisited
- Gold Kist Farms Silos
- Lafayette House 03
- Columbia House 01
- Columbia Barn 01
- Cash's Towing
- Coastal Revisited
- Suwannee Shack
- Hernando House 01
- Lafayette House 02
- Lafayette House 01 Revisited
- Lafayette Chimney Revisited
- Lafayette Quarry Revisited
- Williston Urbex
- Elljay Garage
- 2012 >
- 2010-2011 >
- Travels >
- Nature >
- Water >
-
Abandonments
>
-
Games
- Food
-
VATS Sucks
- Stuff
- About


 RSS Feed