
This is the 2nd most common failed part of the VATS system. This is much easier to disable than the ignition switch.
If you wish to repair the faulty Starter Enable Relay, it is relatively simple and cheap to do. You may also bypass it if you wish. If you have bypassed the lock cylinder, then this system can also be bypassed. If you wish to keep this system in place, you can simply replace the faulty relay.
For replacement options, read the first half of this page. For bypass options, skip down to the second half of this page. Either option will require you to follow the instructions for removing the dash to get to the relay.
Dash Removal
Things you will need:
The Starter Relay is located behind the DIC (Driver Information Center) Panel. To remove this, you will need to remove a few dash panels.
Removing the Gauge and Radio Bezel
- small flathead screwdriver
- Philips screwdriver
- 7mm nut driver or socket
- large butt connector or large wire nut
- shrink wrap or electrical tape (if removing)
- wire crimper/stripper/cutter (if removing)
The Starter Relay is located behind the DIC (Driver Information Center) Panel. To remove this, you will need to remove a few dash panels.
Removing the Gauge and Radio Bezel
- Gauge Bezel
- Using the Philips screwdriver, remove the 3 screws on the door side of the gauge bezel and the 4 screws on the front.
- Next remove the headlight switch knob. Using the flathead screwdriver, push the spring clip back into the knob and gently pull it off while still pressing the spring clip.
- Tilt the steering wheel all the way down and then unscrew the tilt lever.
- Gently pull the gauge bezel forward, up and out and set it aside.
- Radio Bezel.
- There is one screw on the left side, two screws on the right side, and 4 screws on the front, located at the center and bottom.
- Gently push the dash pad up a tad and pull the radio bezel forward and out and set it aside.
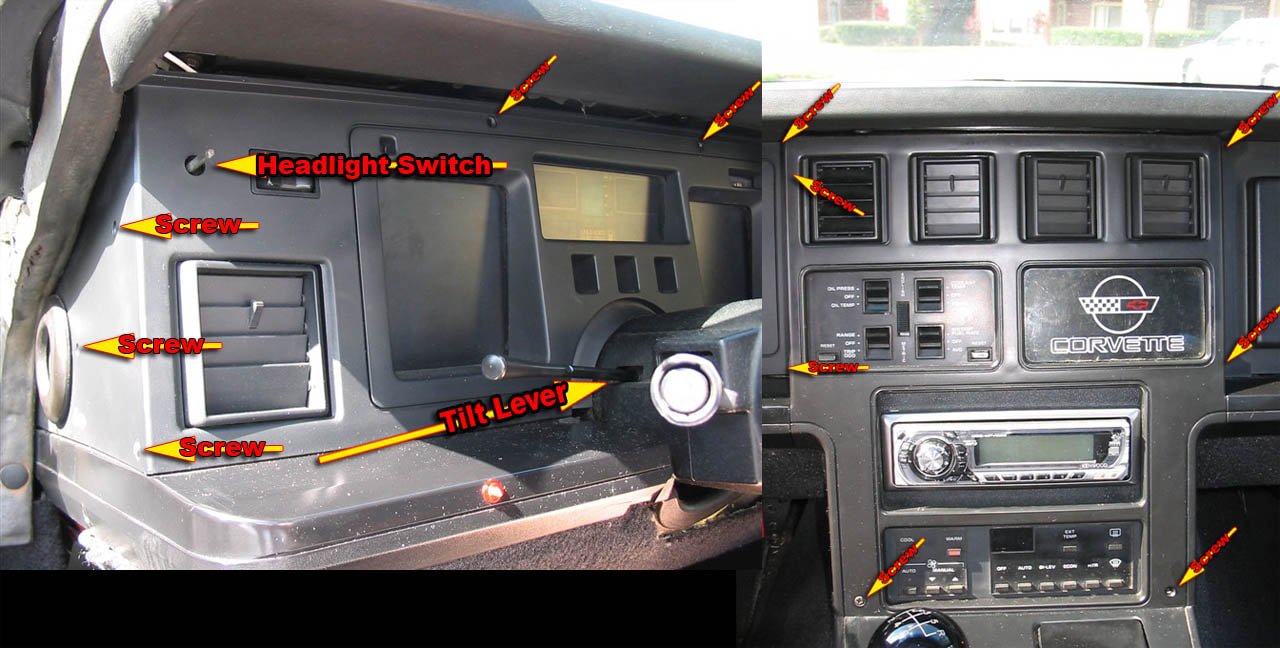
Gauge and Radio Bezel Screw Locations
Removing the DIC Panel
(DIC Panel = Driver Information Control Panel )
- Using a 7mm nut driver or socket, remove the 3 small bolts holding the DIC to the dash.
- Gently pull it out and let it hang down out of the way.
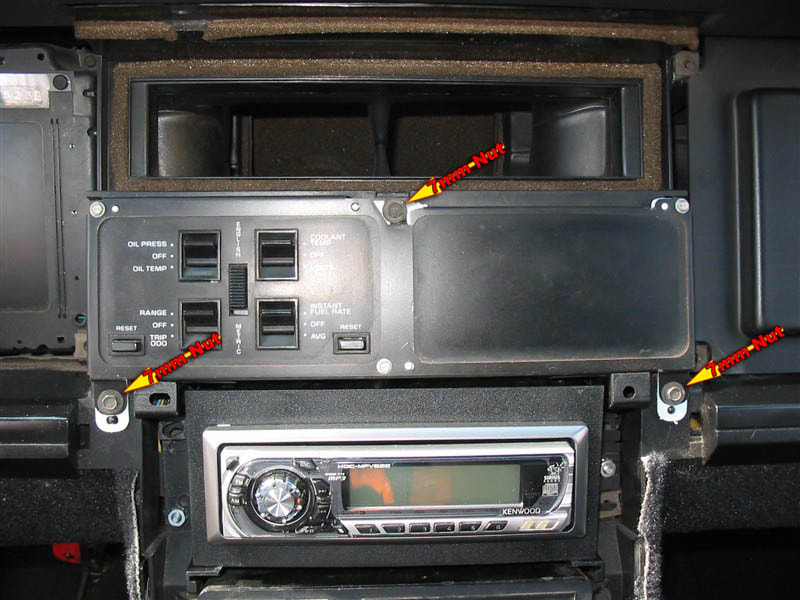
DIC Panel Screw Locations
Behind the DIC panel is the start enable relay.
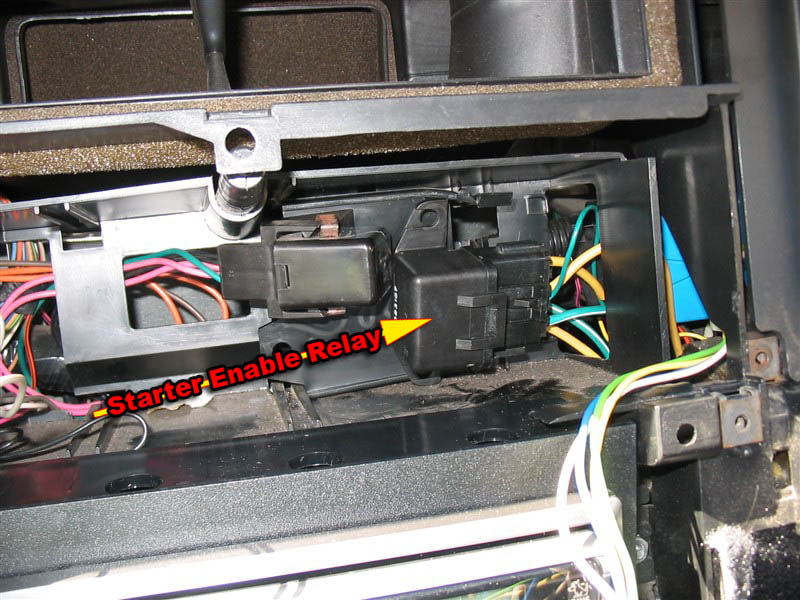
Start Enable Relay Location
Repair Information
If you do not wish to bypass this component, you can simply replace it at this point and then skip straight to last step of starting it up to see if it works.
Part Needed: Start Enable Relay GM PART # 14093107
Once you have obtained the part, simply unplug the old relay and plug the new one in.
Start the car to see if this took care of the problem.
Part Needed: Start Enable Relay GM PART # 14093107
- GM Parts Direct – $12 (search part number 14093107)
- Advance Auto Parts – $16 (search part number 14093107)
- AutoZone – Doesn’t seem to have this item
Once you have obtained the part, simply unplug the old relay and plug the new one in.
Start the car to see if this took care of the problem.
Bypass Information
Disconnect the relay from the wiring harness.
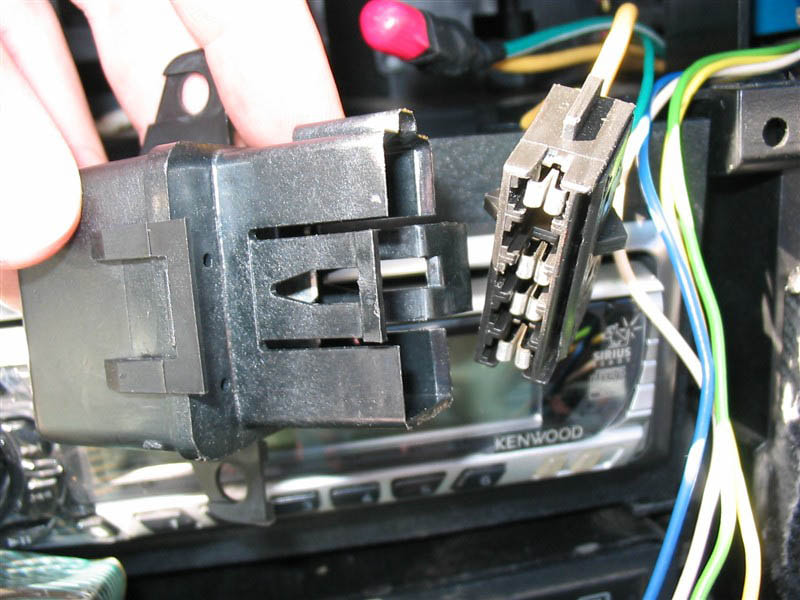
Unplugging Start Enable Relay
If the plastic piece it is mounted to is in the way, unscrew it and set it aside.
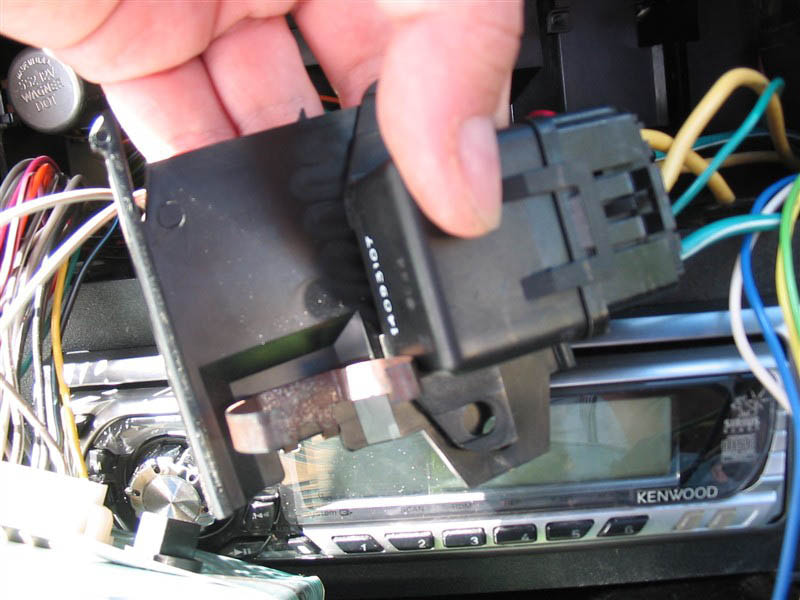
Relay Mounted to Plastic Mount Tray
There should be 4 wires coming out of the harness.
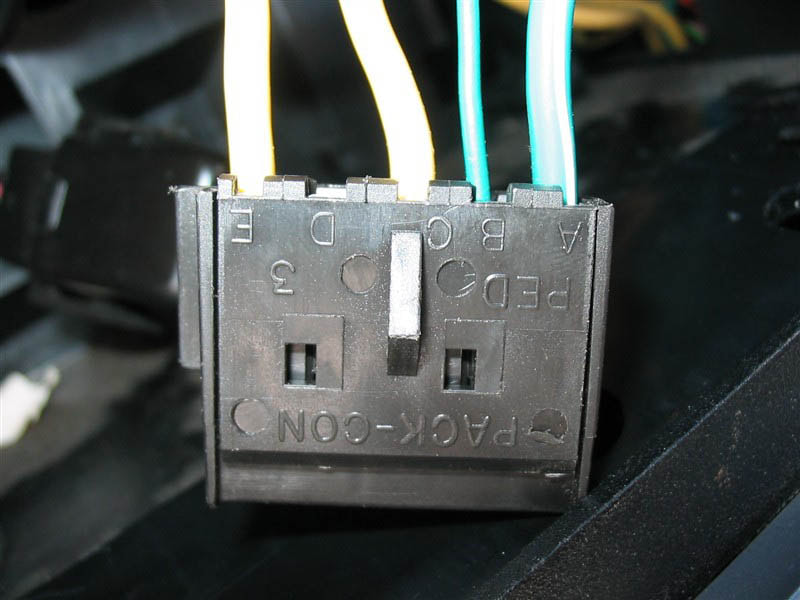
4 Wires Coming Out of Harness
The wiring colors for 1986-1989 are as follows:

- Note 1 Below: 1990-1991 information for reference only. Need to verify if correct.
- Note 2 Starter Enable Relay located in different location on 1990-1991 cars

For 1986-1989 relays, jump wires from Pin A ( DK GRN/WHT) and Pin E (YEL) together. Leave some excess sticking out of the wiring harness in case you ever want to revert back to using the relay again.
For the photos below, I simply cut mine and tied them together. I did this in a parking lot late at night. You can read about my story in the left hand menu. I would prefer to have used a large butt connector and shrink wrap, but I made do with what I had on hand. Just make sure the connection is secured firmly and covered safely.
For the photos below, I simply cut mine and tied them together. I did this in a parking lot late at night. You can read about my story in the left hand menu. I would prefer to have used a large butt connector and shrink wrap, but I made do with what I had on hand. Just make sure the connection is secured firmly and covered safely.
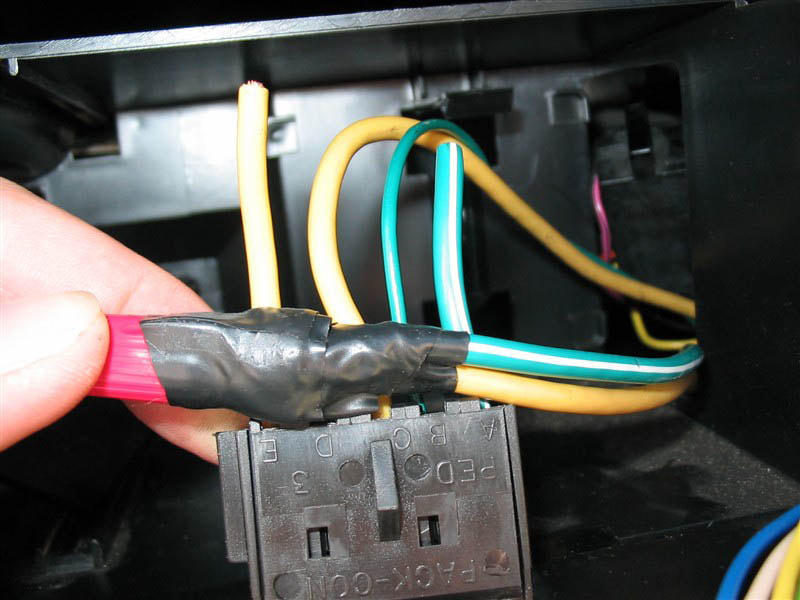
Cut wires and tied them together
|
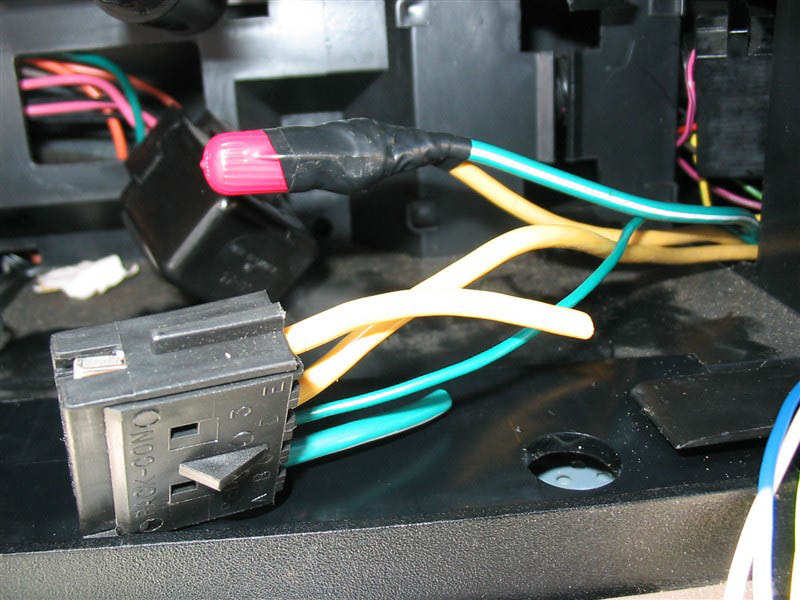
The bypassed relay
|
Your car should start right up now.
If not, continue on to the last stage of VATS Fuel Enable Signal.
If not, continue on to the last stage of VATS Fuel Enable Signal.